

Centralised Exchanges (CEXes) are popular among cryptocurrency traders and investors because of several reasons. Some traders prefer to trade on a CEX because of their high liquidity, fast transactions, fiat-crypto trading functionality, derivatives markets, among others. There are several centralised exchanges working in the cryptocurrency market, the top ones by trading volume are Binance, Coinbase, FTX, Kraken, etc. To work with a CEX, you need to either transfer your fiat currency, i.e. government-issued currency like the US Dollar or the Euro, or transfer an already-bought cryptocurrency to it.
A very common type of cryptocurrency that is found in almost every crypto wallet are stablecoins. Stablecoins are a kind of cryptocurrency the value of which is not subject to volatility and they do not increase or decrease in value. This is why crypto traders exchange to these stablecoins back and forth to stay safe from market volatility. The most common type of stablecoins is fiat-backed, for minting (issuing) of which there is an equivalent amount of fiat currency. This is what makes a stablecoin volatility-free and stable in value. The most common stablecoins by market capitalization are Tether (USDT) and USD Coin (USDC). This article explains how to deposit USDC from your MetaMask Wallet to Binance in 13 simple steps.
Steps to deposit USDC to Binance
- Open your MetaMask Wallet and check the network you are one. In this example, the USDC token is on the Ethereum network. Memorise or write the network somewhere so that you don’t forget it. You are going to need this network in Step 6. You must choose the same network in your Binance account.
- Sign in to your Binance app or the web version.
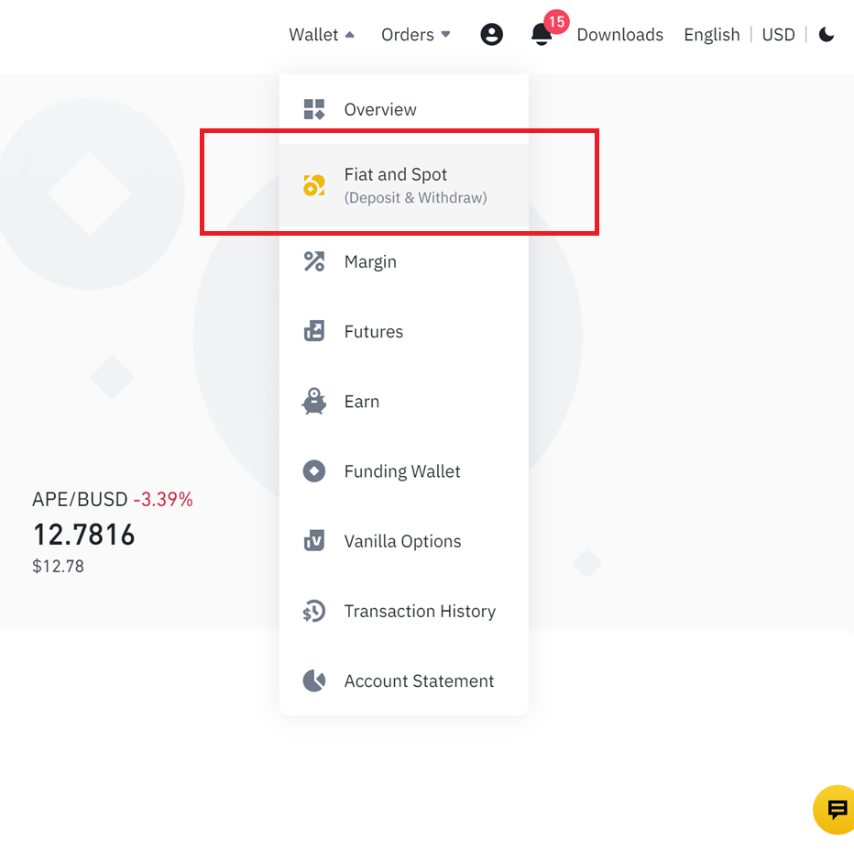
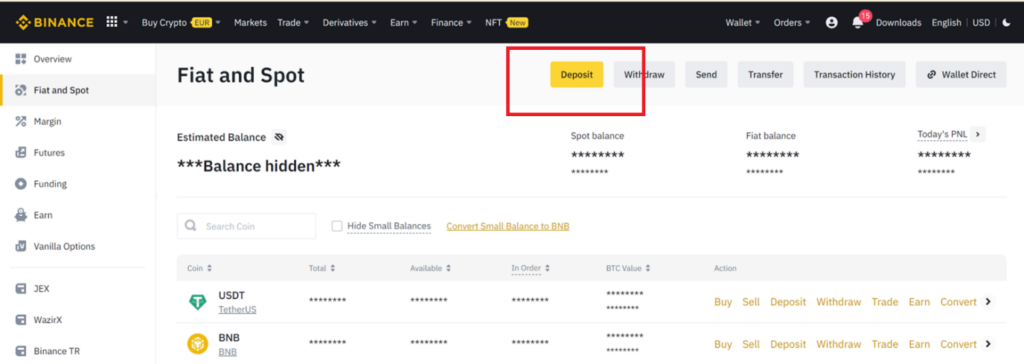
- Hover your mouse over ‘Wallet’ and click on ‘Fiat and Spot (Deposit & Withdraw)’.
- Click on ‘Deposit’ button.
- On the ‘Deposit Crypto’ page, find ‘Select coin’, and choose the cryptocurrency you wish to transfer to Binance (in this case, choose USDC).
- On the ‘Deposit to’ page you need to choose the network you want to make the transfer on. It is very important to make sure that the network you choose here is the same network you are going to choose in the wallet. THE DEPOSIT AND WITHDRAWAL NETWORKS MUST BE THE SAME OR YOU WILL LOSE YOUR ASSETS. In the example given in Stage 1, the USDC is on Ethereum network, so you have to choose ERC20 here as well.
Why all the trouble? Did you know that you can swap, invest and do much more on a decentralized platform? Join us today and set off for your DeFi journey with CrowdSwap.


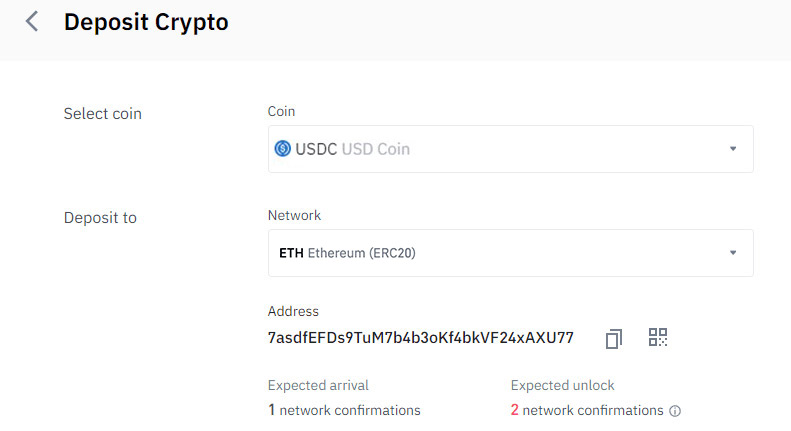
- The address shows up. You can tap on the copy icon to copy the address to the clipboard or tap on the QR code icon to get the QR code for scanning by your phone.
- Go back to your MetaMask Wallet and choose USDC in the ‘Assets’ section.
- Hit ‘Send’ and double check the network on the top.
- In the ‘Send to’ window, you can either tap on ‘PASTE’ if you have selected the copy icon in Stage 7. If you wish to scan the QR code instead, tap on its icon.
- Enter the amount you want to transfer to Binance. You can also choose ‘MAX’ to transfer all your USDC.
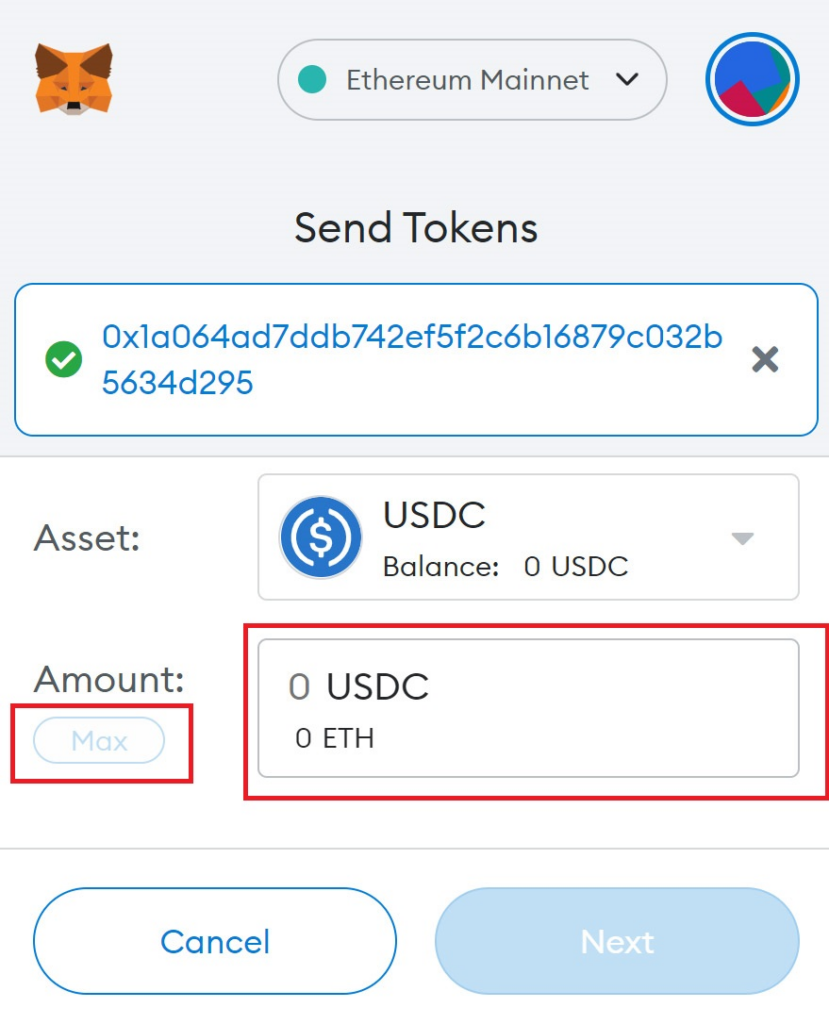
- Tap on ‘Next’ on the bottom right corner.
- In the final window, review the amount and the recipient address, as well as the network fee, and then hit ‘CONFIRM’.
Based on the network you choose and the workload on that particular network, your USDC may be expected to arrive in your Binance wallet in a minute or more. Congratulations! You have now completed a crypto transfer.